


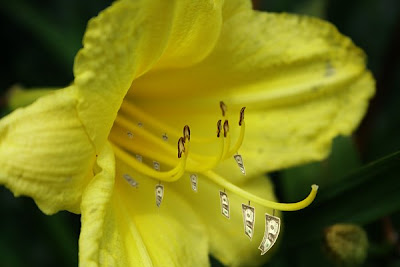
Today I am going to show you how to create this image:

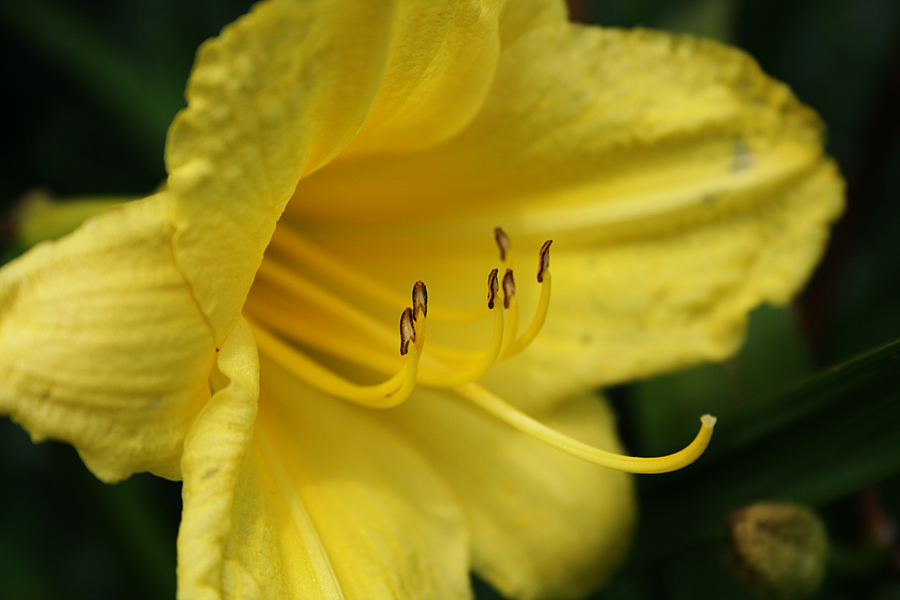
1. Open up the flower image provided here. Duplicate the image and go to Hue/Saturation and change the hue to +10. Change this layer's mode to "Color". Lower the opacity to 50%.

2. Paste in your dollar bill image. Rotate it to be going vertical if needed. Don't bother resizing the original dollar layer, instead just duplicate the layer and scale the duplicate layer to a realistic size. Place it under one of the arms of the flower.

3. Open up an image of an apple's stem. Render out just the stem and place it right above the dollar. Merge the stem layer onto the dollar layer. Duplicate this layer and hide one of them. Go to Edit>Transform>Warp and manipulate the dollar to make it look unique and natural.

4. Reveal the duplicated stem-dollar layer and duplicate it several more times and move those duplicates to other locations on the flower. Go to Edit>Transform>Warp for each bill to give them a unique look. Scale them to realistic sizes. Blur the dollar bills that are further away. Use the Dodge/Burn Tool to add some dynamic lighting and shading onto the dollar bills.

5. Select each of the dollar bills by either going to Select>Load Selection>Add to Selection on each layer or holding Ctrl and Shift while clicking on each layer's icon on the layer's dialog. Create a new layer and fill the selection with color #a28a00. Change the layer mode to "Soft Light" and lower the opacity to 60%.
6. Create a new layer and go to Image>Apply Image. Using the Burn Tool, darken the center area of the flower with a very large soft brush. You may need to select everything but the part of the flower that is on the left that should stay light

7. Now for some gradient maps. Create a new layer and go to Image>Apply Image. Now go to Image>Adjustments>Gradient Map and change the map to the already made Purple-Orange gradient. Change the layer mode to "Soft Light" at 25%. Repeat this process except this time use a light blue as the foreground of the gradient and a dark blue for the background. Change the layer mode to "Saturation" at 35%.

You're now finished, congratulations :)
Search
- Jacob Philpott
- I'm a student at the University of Texas studying Advertising. This blog is just my thoughts and observations about the advertising world.
Author
Subscribe to:
Post Comments (Atom)
13 comments:
That was very helpful Thanks!
角色扮演|跳蛋|情趣跳蛋|煙火批發|煙火|情趣用品|SM|
按摩棒|電動按摩棒|飛機杯|自慰套|自慰套|情趣內衣|
live119|live119論壇|
潤滑液|內衣|性感內衣|自慰器|
充氣娃娃|AV|情趣|衣蝶|
情趣用品,情趣,
G點|性感丁字褲|吊帶襪|丁字褲|無線跳蛋|性感睡衣|
Thanks for sharing. I've been looking for this type of photo manipulation tutorial and i'm glad that i finally found it. I like how you write the tutorial. It's very detailed and easy to understand. Keep up the good work. olde cypress real estate
I am always looking for this blog to get the article or information regarding the designing concept in photoshop tool.Because this blog having the many post and explained the process of working in photoshop tool.
Web Design Companies Bangalore | Website Development Bangalore
Cute snaps.
Web Designing Companies Bangalore | Website Development Companies Bangalore
I was working and suddenly I visits your site frequently and recommended it to me to read also. The writing style is superior and the content is relevant. Thanks for the insight you provide the readers!
facebook entrar
facebook entrar iniciar sesion
facebook en español descargar
facebook entrar direto agora
Great Post!
Niagara Falls Airport Taxi
Richmond Hill Airport Taxi
Markham Airport Taxi
Vaughan Airport Taxi
Pickering Airport Taxi
Any way I'll be subscribing to your feed and I hope you post again soon.
Signature:
The place to play all unblocked games 77 online. Here you can find every blocked games such as: unblockedgames , unblocked games happy , unblocked games 77 ,
our blog is my stepping stone, my friend. Thanks for the heads up on this subject. stick-rpg2.com
Thank you for such a sweet tutorial - all this time later, I've found it and love the end result. I appreciate the time you spent sharing your skills.
http://word-cookies-answers.com
Thanks for sharing a useful knowledge-sharing blog.
It helps in understanding and increase in knowledge.
Best Regards,
Prestashop addons magento extensions opencart modules crm plugins useful blogs
PrestaShop Magento Opencart CRM Useful Blogs and How to do videos
Post a Comment